This DIY Toner Calms Redness in Minutes
This DIY toner instantly calms redness, providing hydration and an invigorating sensation that your skin craves. Combining aloe vera and green tea, it’s packed with anti-inflammatory properties that soothe irritated skin. Witch hazel tightens pores while lavender oil adds a relaxing aroma. Apply this toner after cleansing for best results, and feel the calming effects in just minutes. If you’re curious about how to prepare it and maximize its benefits, keep exploring the details ahead.
Understanding Skin Redness
Have you ever wondered why your skin sometimes flushes red?
This redness can stem from various causes, like stress, heat, or irritation.
When your body senses a trigger, it sends blood to the skin’s surface, creating that flushed appearance.
You might notice it more after eating spicy foods or during intense workouts.
To combat this, a redness face remedy can be incredibly effective.
Simple solutions like cold compresses, aloe vera, or soothing creams can help calm your skin. Natural treatments like chamomile tea compresses are also helpful for reducing redness.
Understanding these triggers and remedies empowers you to take control and restore your skin’s natural balance, making you feel more confident and comfortable.
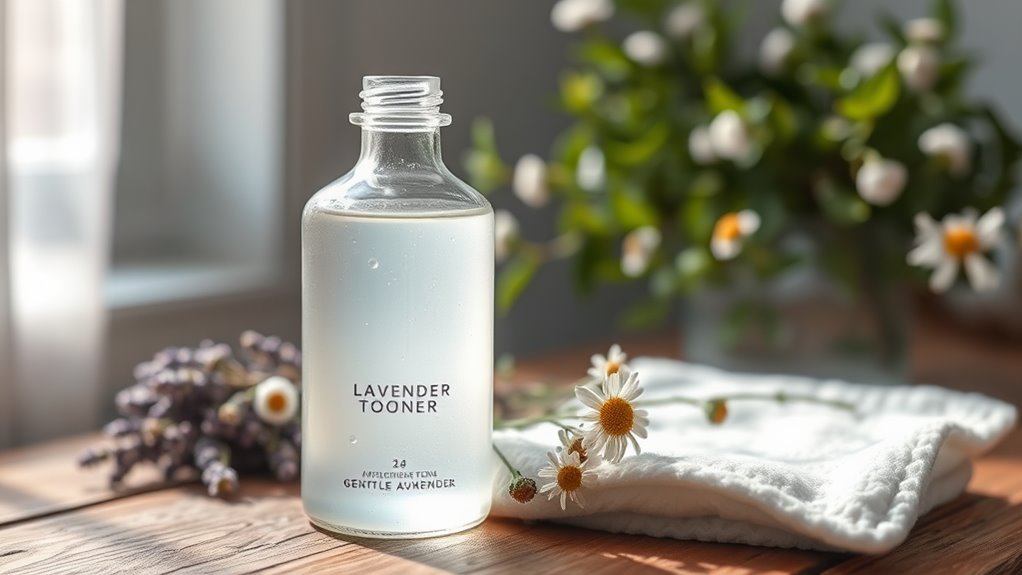
Key Ingredients for Your DIY Toner
Creating your own toner can be a rewarding way to address skin redness naturally.
Start with soothing ingredients like rose water, which hydrates and calms irritation.
Aloe vera is another powerhouse, known for its anti-inflammatory properties that promote healing.
To enhance your toner, consider adding chamomile tea, rich in antioxidants, or witch hazel, which tightens pores and reduces inflammation.
You might also include a few drops of essential oils like lavender for additional calming effects. Additionally, using honey in your toner can help reduce redness and acts as a moisturizer.
Step-by-Step Toner Preparation
Now that you’ve gathered your key ingredients, it’s time to prepare your DIY toner.
You’ll find the mixing instructions straightforward, making this process both quick and enjoyable.
Plus, knowing how to store your toner properly will help you maximize its shelf life, ensuring you get the most out of your creation. Additionally, incorporating quick remedies using household ingredients can enhance the soothing effects of your toner.
Essential Ingredients Needed
To craft an effective DIY toner for redness, you’ll need a few essential ingredients that work harmoniously to soothe and balance your skin.
Gather these items:
- Aloe Vera Gel – Known for its calming properties, it hydrates and reduces irritation.
- Green Tea – Packed with antioxidants, this helps combat inflammation and redness.
- Witch Hazel – A natural astringent that tightens pores and controls oil without over-drying.
- Lavender Essential Oil – Its soothing scent and anti-inflammatory benefits promote relaxation and skin healing.
With these ingredients on hand, you’re well on your way to creating a toner that calms and refreshes!
Mixing Instructions Simplified
Mixing your DIY toner is a straightforward process that takes just a few minutes.
Start by gathering your essential ingredients, like witch hazel and green tea.
In a clean bowl, combine one part witch hazel with two parts brewed green tea.
Stir gently to blend the ingredients.
If you’d like, add a few drops of essential oil for a soothing scent.
Next, use a funnel to pour the mixture into a clean spray bottle or jar.
Shake well before each use to make sure everything’s mixed.
Now, you’re ready to apply your calming toner and enjoy its redness-reducing benefits!
Storage and Shelf Life
Proper storage is essential for maintaining the efficacy of your DIY toner and ensuring it remains safe for use. Follow these tips to keep your toner fresh:
- Use a dark glass bottle – Protects against light, which can degrade ingredients.
- Store in a cool, dry place – Heat and humidity can alter its effectiveness.
- Label with the date – Keep track of freshness and avoid using expired products.
- Refrigerate for longer shelf life – Cooling can extend the toner’s usability, especially if it contains natural ingredients.
With proper care, you’ll enjoy your calming toner for weeks to come!
Application Tips for Best Results
To get the most out of your DIY toner, prepping your skin is essential.
Start with a clean face to make sure that the toner can penetrate effectively and work its magic.
Once applied, using gentle techniques will enhance absorption and provide soothing relief to redness. Additionally, incorporating cool compresses can offer immediate comfort while using the toner.
Prepping Your Skin
Before applying your DIY toner, it’s essential to prepare your skin to guarantee maximum effectiveness and comfort.
Start with these simple steps:
- Cleanse: Use a gentle cleanser to remove dirt and makeup, ensuring a fresh canvas.
- Exfoliate: Lightly exfoliate to eliminate dead skin cells, promoting better absorption of the toner.
- Pat Dry: Gently pat your skin dry with a clean towel, avoiding any aggressive rubbing.
- Moisturize: Apply a light moisturizer to hydrate your skin, creating a balanced surface for the toner.
Application Techniques
Once your skin is prepped and ready, applying the toner correctly can enhance its calming effects on redness. Start by saturating a cotton pad with the toner, then gently swipe it across your face, avoiding the eye area. You can also use your fingertips to pat the toner directly onto your skin for a more intensive treatment. Allow it to absorb fully before applying any additional products.
| Application Method | Tips |
|---|---|
| Cotton Pad | Use gentle, sweeping motions |
| Fingertips | Dab lightly for better absorption |
| Frequency | Apply twice daily for best results |
| Storage | Keep in a cool, dark place |
Additional Benefits of the Toner
Here are four compelling reasons to incorporate it:
- Hydration: It helps lock in moisture, leaving your skin plump and refreshed.
- Pore Minimization: Regular use can tighten pores, giving your complexion a smoother appearance.
- Balancing Oil Production: It regulates oil levels, perfect for those with combination skin.
- Soothing Sensation: The calming ingredients provide a cooling effect, making it ideal for post-sun exposure. Additionally, the inclusion of hyaluronic acid in this toner can enhance its hydrating properties.
These benefits make this toner a versatile addition to your daily regimen!
Storing Your DIY Toner
To fully enjoy the numerous benefits of your DIY toner, proper storage is key.
Keep your toner in a clean, dark glass bottle to shield it from light, which can degrade its ingredients.
Store it in a cool, dry place, away from direct sunlight or heat sources.
This will help maintain its potency and effectiveness.
Remember to label your bottle with the date you made it, ensuring you use it within a month for peak freshness.
A quick shake before each use will also help mix any settled ingredients, ensuring your skin gets the full calming effects it deserves. Additionally, consider incorporating natural antibacterial properties from ingredients like baking soda to further enhance your toner’s efficacy.